Services · Silicone Replacement
Shower Silicone Replacement Melbourne
Full removal of failed shower silicone and reapplication of a neat, waterproof bead on wall-to-wall, wall-to-floor and screen junctions.
Same-day response · Melbourne based · No tile removal where possible
Recent silicone replacement results
Real Melbourne jobs — before, during and after.
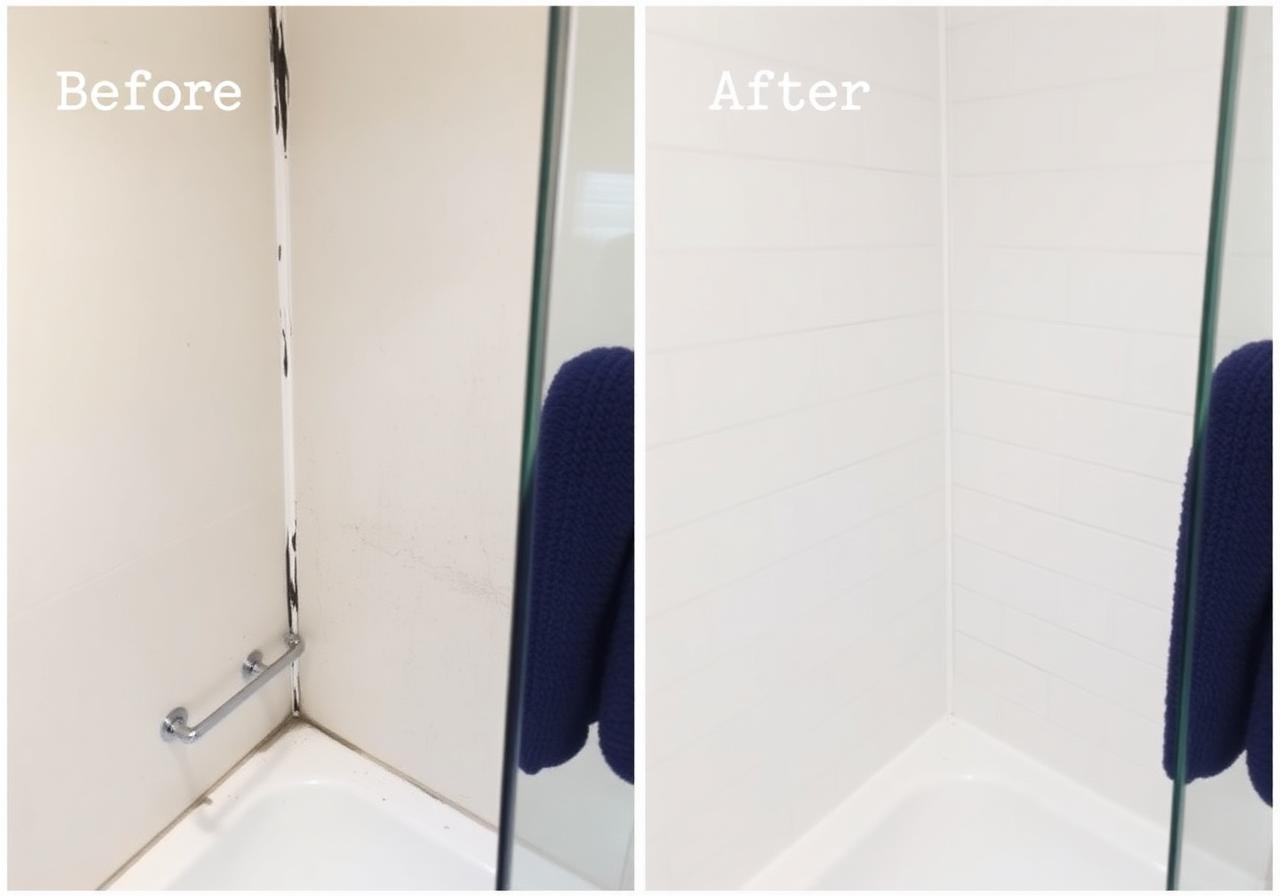
Silicone reseal
Mouldy black silicone stripped and replaced with a clean anti-mould bead.
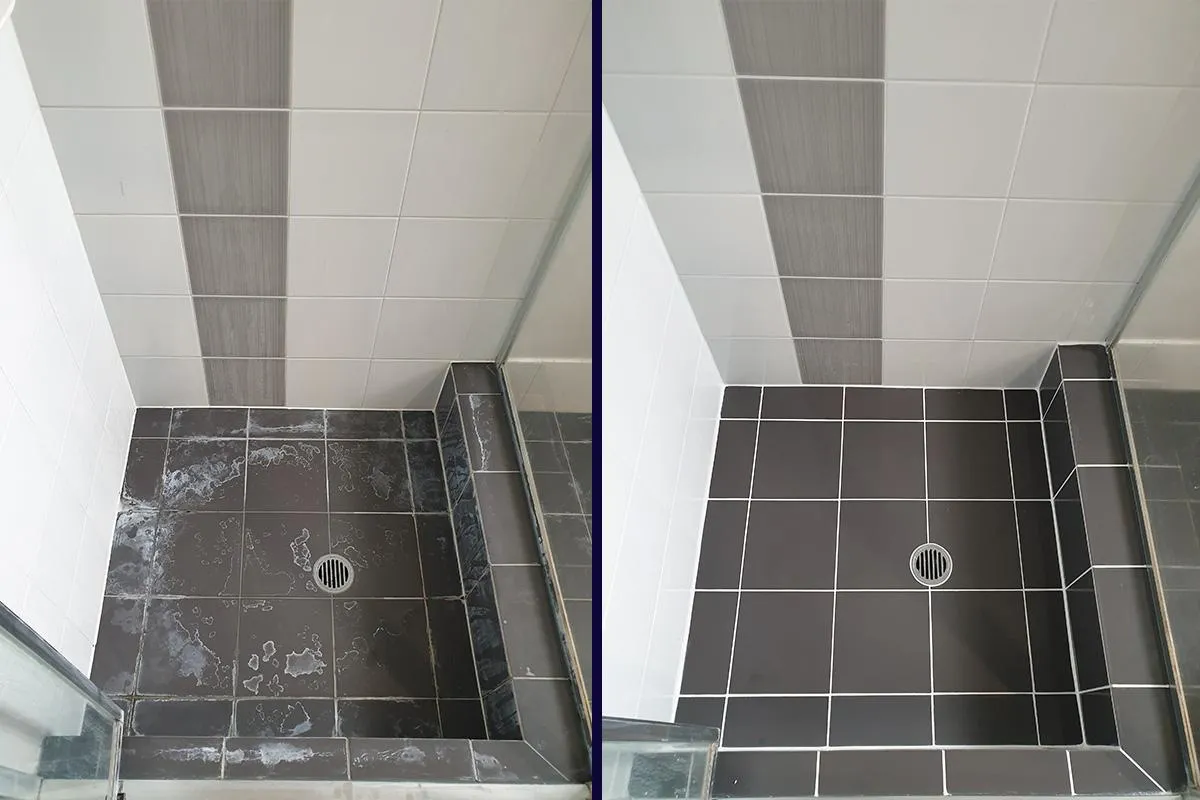
Regrout + deep clean
Stained grout removed, tiles deep-cleaned, fresh uniform grout laid.
Silicone is the flexible seal that handles movement between materials — wall to wall, wall to floor, tile to screen, and around the shower base. It is not decoration; it is the joint that keeps water inside the shower.
When silicone splits, peels, discolours or grows mould that will not clean off, water is getting behind the seal. Applying new silicone over old silicone traps that moisture. A proper replacement removes the old bead completely, prepares the joint and lays a clean, continuous new seal.
Common causes
- Silicone applied over old silicone, paint or soap residue so it never bonded
- The wrong product used — non-sanitary or non-neutral-cure sealant in a wet area
- Movement between the tile, screen and base tearing the bead
- Mould colonising soap film trapped along the joint
- Poor extraction fan or no window, so the joint never fully dries
- A rushed DIY bead applied without masking, cleaning or drying the joint
When you need this repair
- Silicone is cracked, peeling or lifting off the tile
- Black or brown staining that returns after cleaning
- Gaps where silicone has pulled away from the screen
- Silicone feels spongy or waterlogged when pressed
- A previous DIY bead has failed or looks messy
What's included
- Full removal of the failed silicone bead
- Cleaning and drying of the joint
- Masking for a straight, consistent finish
- New neutral-cure silicone applied and tooled
- Written quote confirmed before work starts
How long it takes
Indicative timeframes for a standard Melbourne shower. Your written quote confirms the timing for your job.
- Photo assessment
- Usually within 5–15 minutes of sending photos
- Full silicone replacement
- 2–4 hours on site for a standard shower
- Skin over / touch dry
- 20–60 minutes
- Safe to shower again
- 24 hours after application
How the repair runs
Step 1
Removal
Old silicone is cut out and the joint scraped back to a clean substrate.
Step 2
Preparation
The joint is cleaned and dried; masking tape is laid for a straight edge.
Step 3
Application
New silicone is applied in a single continuous bead and tooled.
Step 4
Cure
The bead is left to cure before the shower is used again.
Frequently asked
Why does silicone keep going mouldy?
Mould feeds on soap film and moisture. Poor ventilation extends the drying time between showers, which speeds up regrowth. New silicone plus better ventilation gives the best result.
Can new silicone be applied over the old bead?
No. Silicone does not bond to old silicone; the result peels within weeks. Full removal is the only reliable approach.
How long does replaced silicone last?
Life depends on ventilation, cleaning products and use. With reasonable care, a properly replaced bead should last several years before showing wear.
Do you use anti-mould silicone?
Yes — neutral-cure sanitary silicone with an anti-mould additive is standard for wet areas.
Silicone Replacement across Melbourne
We service the whole metro area. Popular suburbs booking silicone replacement:
Related services
Shower Resealing
Full renewal of the grout and silicone joints in a shower — a lower-cost alternative to a renovation when the tiles and waterproofing are still sound.
See detailsGrout Repair
Targeted repairs for cracked, missing or discoloured shower grout — restoring a clean, water-shedding surface without removing tiles.
See detailsLeaking Shower Repair
Diagnose and repair leaking showers — including regrouting, silicone replacement, joint sealing and internal waterproofing where accessible.
See detailsBook your silicone replacement today
Send photos now — we usually respond within 5–15 minutes with a fixed written quote. Most jobs booked within 24–72 hours.